The Pendulum Test-Guide
The Pendulum Test-Guide
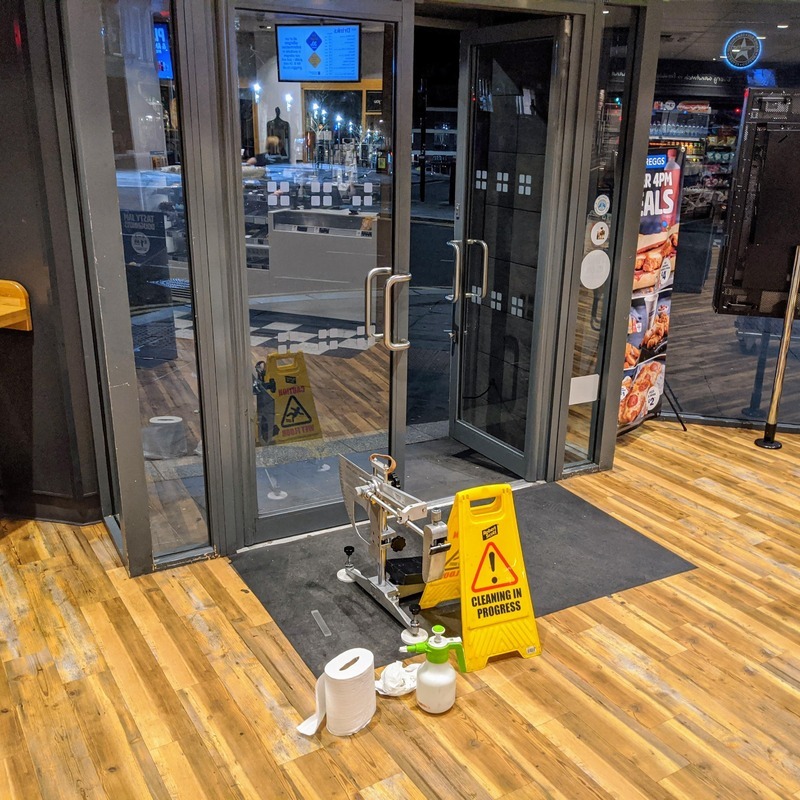
The method of the British standard for estimating slip resistance is known as the Pendulum test. The result of the test determines whether the flooring can be used in public places. The pendulum test surveys the friction caused between a surface of the floor when a foot comes into contact with it. The HSE suggests a score of at least 36 for floor coverings to be utilized out in the open spots in both wet and dry conditions. This method is favored by the Health and Safety Executives for testing.
What does a pendulum test include?
In a pendulum test, you have to swing a pendulum across the tile's surface.
The steps to be followed are:
1) Firstly, the machine to be used should be zeroed. Doing this will confirm whether the machine works properly.
2) Now, swing the pendulum across the tile a total of three times in the beginning. After this, once again do it five times. For the PTV, an average of the last swings is considered.
3) Note that earlier the pendulum was swung only in one direction. As we know that slipping risk could be at random regardless of the direction. For this, perform the test two more times. This time make sure that the directions are different than earlier. This ensures that the slip resistance test is accurate.
4) When the test is performed on a dry tile, make sure to repeat the test and apply water to the surface of the tile this time. Every time you do this make sure that zeroing of the machine is done. Also, note that the tile should be moved in three positions that were the same.
How does the Pendulum Test work?
A swinging arm is present over the floor to be tested. This arm sweeps over it which in turn controls the pendulum test. Towards the arm's edge, a slider made from rubber is present. This slider moves through a fixed distance while striking and passing through the floor. It can be concluded that no friction is present if there is horizontal to the horizontal movement of the arm without touching the floor. And when the arm strikes the floor, the arm starts to swing less further. This is when there is less friction present.
How is the test estimated?
The Pendulum's arm comes with a pointer. The Pendulum Test Value (PTV) is determined by the pointer. Coming to the Pendulum Test Values, there are three categories according to the risks:
Low: 36+
Moderate: 25-35
High: 0-24
What is a PTV:
The accident risk is compared with the values of the PTV. This can be comprehended in such a way that if there is a PTV value of 19, then there could be a 1 in 2 risk of an accident. In the case of other values of PTV, the risk will differ.
Many a time in both dry as well as wet conditions, a PTV of 36+ is considered to be the HSE benchmark. If at all your floor crosses this value then there could be more accidents on the floor.
R ratings explained:
We must understand that R ratings are not calculated through the PTV. Usually, the R ratings start with R9 instead of starting from R1. As there is no R1 to R8 ratings, R9 can be considered to be the one where there could be more accidents on the floor. R13 ratings are considered to be the ones with the lowest risks. Just because R13 has a low slipping risk, you should not use it in living rooms, etc. In the case of living rooms, kitchens, or bathrooms you can opt for R11 or R12. The R13 tiles are meant for areas where there is more water like swimming pools, wet rooms, etc.
Standard sliders:
Slider 96 represents the footwear of an average pedestrian while slider 55 represents no footwear i.e. barefoot. These are the two standard sliders.
Is a Pendulum Test necessary?
The Pendulum Test is the subject of a British Standard and has been suggested by the HSE (Health and Safety Executive). It is the main test utilized in prosecution. If you pass the pendulum test it remains as proof that the flooring you have is safe.
This helps in answering the insurance companies, specialists, lawyers, etc.

Share
Recent posts
-
Why is the Pendulum Tester the Preferred Method for Slip Testing?
Posted 9th April, 2024 -
How to Prevent Slippery Floors
Posted 9th April, 2024 -
Slip Risk Assessment in Laboratories
Posted 9th April, 2024 -
Benefits of Slip Risk Assessment Service
Posted 9th April, 2024 -
Slip and Fall Accident Report Guide
Posted 22nd February, 2024 -
What is pendulum slip testing and how does it assess slip resistance?
Posted 28th January, 2024
